Wall mounting
| Warning | |
|---|---|
 | |
| Warning | |
|---|---|
 | |
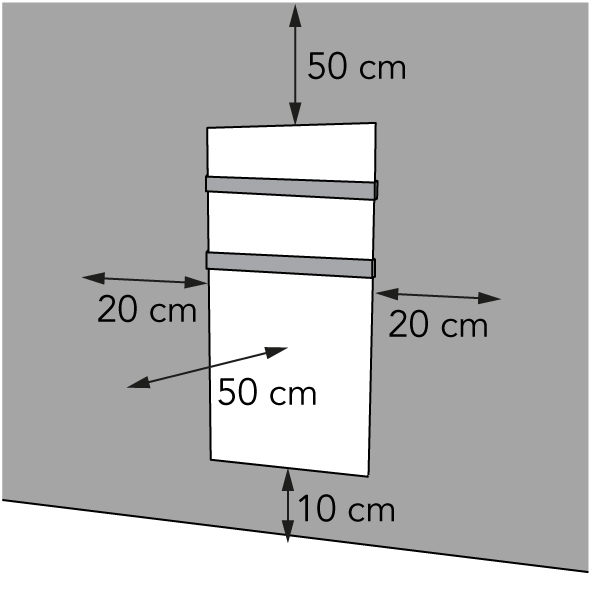
| 1. | Place the device on a non-flammable and solid wall. |
|
| 2. | Place the device with a minimum distance (Figure 1) of:
|
|
| 3. | Do not mount the device:
|
|
| 4. | Place the wall bracket (Figure 2, pos. 1) against the wall and mark the five holes. |

|
| 5. | Drill five holes at the marked spots. | |
| 6. | Place plugs (Figure 2, pos. 3). | |
| 7. | Screw and tighten the wall bracket (Figure 2, pos. 1) to the wall with five large screws (Figure 2, pos. 2) using a Phillips screwdriver (Figure 2, pos. 4). |
| 8. | Lay the device down on a soft steady surface (Figure 3, pos. 4). |

|
| 9. | Place the two towel rails (Figure 3, pos. 3) on two of the three possible locations on the main body (Figure 3, pos. ). | |
| 10. | Screw and tighten the two towel rails (Figure 3, pos. 3) with eight small screws (Figure 3, pos. 2) using a Philips screwdriver (Figure 3, pos. 1). |

| 11. | Place the device brackets (Figure 4, pos. 3) over the wall bracket (Figure 4, pos. 1). |

|
| 12. | Slide the device (Figure 4, pos. 2) into the openings of the wall bracket. | |
| 13. | Screw and tighten the device (Figure 5, pos. 1) with a small screw (Figure 5, pos. 3) to the wall bracket using a Phillips screwdriver (Figure 5, pos. 2). |