Wall mounting
| Warning | |
|---|---|
 | |
| Warning | |
|---|---|
 | |
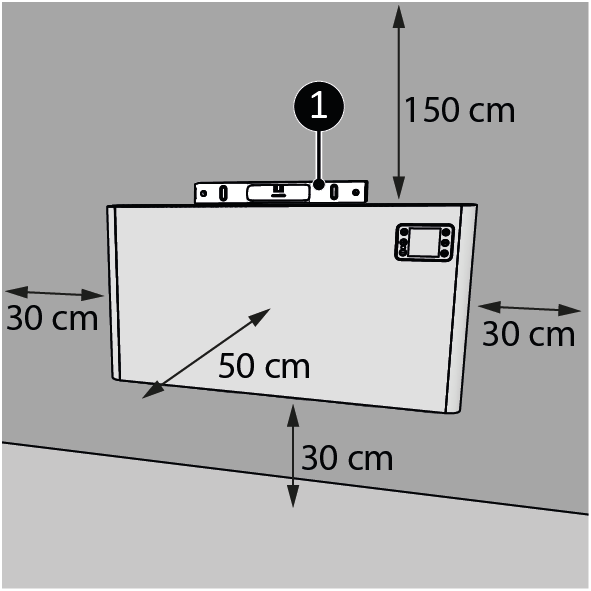
| 1. | Place the device on a vertical and solid surface. Use a spirit level when placing the device (Figure 1, pos. 1). |
|
| 2. | Place the device with a minimum distance (Figure 1) of:
|
|
| 3. | Do not mount the device:
|
| 4. |
Drill two holes at least 610 mm above the floor for the brackets. The distance between the holes is approximately (Figure 2, pos. A)*:
|

|
| 5. | Place wall plugs (Figure 2, pos. 2). | |
| 6. | Screw and tighten a left and a right bracket (Figure 2, pos. 3) to the wall with a large screw (Figure 2, pos. 4) using a Phillips screwdriver (Figure 2, pos. 1). |
| Warning | |
|---|---|
| |
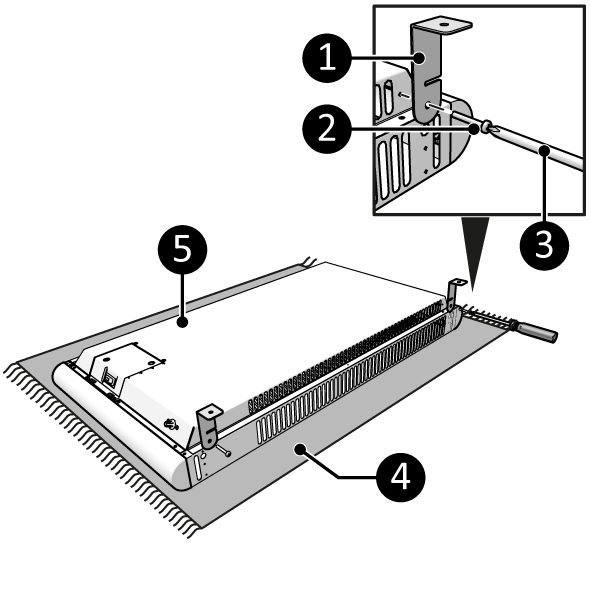
| 7. | Lay the device down on a soft steady surface (Figure 3, pos. 4). |
|
| 8. | Screw and tighten two brackets (Figure 3, pos. 1) on both sides of the main body (Figure 3, pos. 5) with a small screw (Figure 3, pos. 2) using a Phillips screwdriver (Figure 3, pos. 3). |
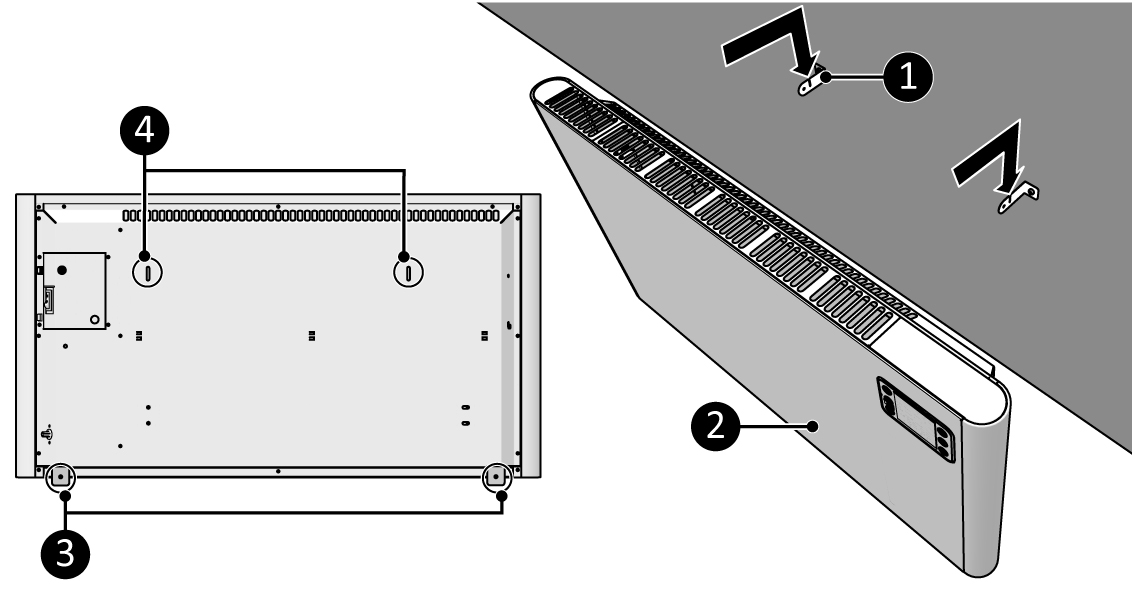
| 9. | Place the bracket holes (Figure 4, pos. 4) over the wall brackets (Figure 4, pos. 1). |
| 10. | Let the device (Figure 4, pos. 2) drop into the openings of the wall brackets (Figure 4, pos. 1). |
| 11. | Use the device brackets (Figure 4, pos. 3) to mark the bottom hole position on the wall. |
| 12. | Remove the device from the wall brackets (Figure 4, pos. 1) |
| 13. | Drill two holes at the marked positions and place the wall plugs. |

|
| 14. | Place the device (Figure 5, pos. 2) back on the wall brackets (Figure 5, pos. 1). | |
| 15. | Screw and tighten the device brackets (Figure 5, pos. 4) with a large screw (Figure 5, pos. 3) to the wall using a Phillips screwdriver (Figure 5, pos. 2). |